

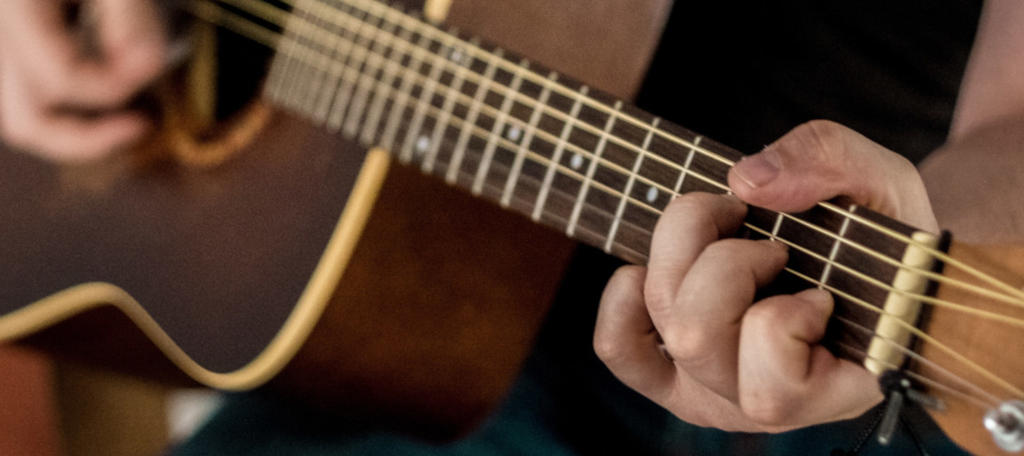
The correct position of your fretting hand plays an important role in playing the guitar.
Most of the times it just feels uncomfortable to play that way. In the worse cases, playing this way can cause wrist pain and injuries.
Either way is obviously wrong and this is something that holds many guitar players back from making the progress they want.
In this article, you will learn how to shape your fretting hand correctly to make the progress you deserve.
How not to position your fretting hand
When I was preparing some additional material for this article, I did a research on Google and Youtube to see what other people write about fret hand position.
To be honest, I was mainly expecting to find good quality video tutorials that I could leave a link to from this article.
However, I was disappointed by the stuff people advise in these videos and articles.
A lot of tutorials are trying to demonstrate you some magical position or shape that your fretting hand must have. For example, the guy in this video is suggesting to hold a tennis ball, and that is what he believes to be the “perfect” shape of the fret hand.
Other than that, he uses his finger to measure the distance from your hand to the guitar fret.
Youtube is a great place to learn the guitar, but something you do come across tutorials like this one, that is absolutely terrible and doesn’t even remotely answer the question of what the fretting hand position should really be.
I really feel bad for those 176, 00o of people who watched this video and followed this advice.
Don’t get me wrong here, I’m not blaming these people. If I was a beginner and I saw a similar tutorial, I would probably think it makes sense.
I’ve been playing the guitar for 9 years and I was hesitating whether or not I should start an educational blog, but after watching tutorials like these I understood that I MUST start a guitar learning blog.
So how do you position your fretting hand properly?
Generally speaking, there are two main “positions” of the fretting hand:
- “phrasing” shape
- “speed” shape
Each of these has its own pros and cons.
Before we take a look at each one, please keep in mind that you shouldn’t lock your hand in either of those.
You must freely switch between these two positions depending on what type of licks/riffs you are playing at that moment.
Phrasing shape
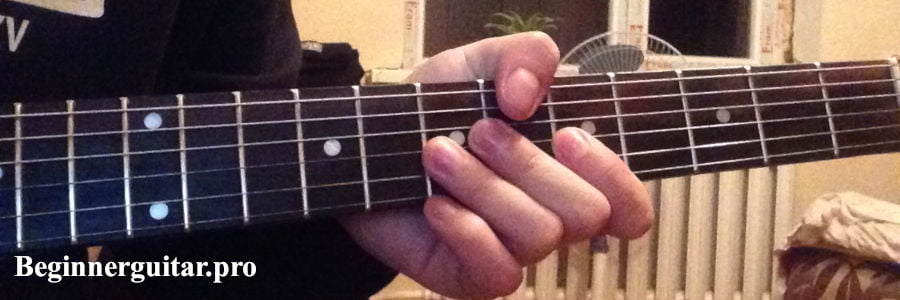
This position works best for playing slower licks and riffs. Keeping your hand at an angle significantly limits your speed, but it allows you to use various soloing techniques like:
- bending
- vibrato
- sliding
- pull-offs
- hammer-ons
These are essential for playing lead guitar. This fretting hand position is very common for playing blues.
Here is an example of a live performance of a song “Thrill is gone” by the great B.B. King. As you can see most guitar players are holding their fret hand at an angle while jamming.
Before you start watching, I’d like to draw your attention to another important detail. Watch how everyone uses a slightly different guitar fretting hand position.
Keep in mind that these are the greatest blues guitar players of our time and this is how they position their fret hands. And now go back to the beginning of the post and watch that “tennis ball” tutorial again (just kidding, please don’t).
Speed shape
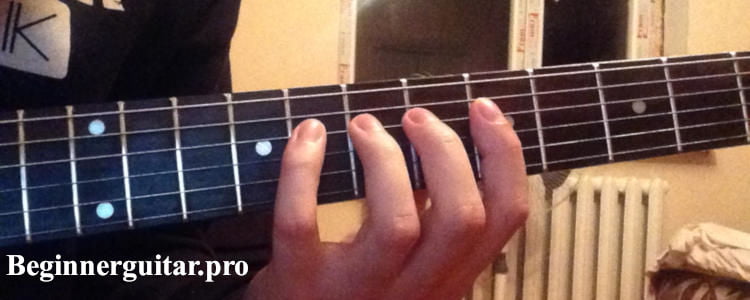
This is a typical hand position for playing high-speed riffs or solos.
The main benefit of this position is efficiency.
You keep your fingers very close to the strings which allows you to play many notes with minimal finger moves.
It is perfect for playing 3 notes per string patterns and moving all around the fretboard.
In addition, it becomes easier to use your fingertips which means higher precision during pull-offs or hammer-ons (that you will use a lot as the BPM goes higher).
However, this shape has some disadvantages that you need to be aware of. It doesn’t offer you much finger strength that you really need for doing vibratos or bends.
It is very difficult to explain it with just words, so I would like to demonstrate you a video of Michael Batio, who is probably one of the fastest guitarists of all time.
Pay attention to how he keeps his fingers at a 90-degree angle to the fretboard. He will slightly change the angle during slower “phrasing” parts of his solo, but only by just a little.
As you may have probably noticed, Machael Batio also uses the speed position to play power chords as well. This is pretty obvious, but still, I see a lot of beginners using absolutely weird hand shapes when playing power chords.
Other than that, I have to link to a great performance of my favorite guitar player – Buckethead (that I am planning to write an article about), where you can clearly see he constantly switches his fretting hand position from speed to phrase shape.
To sum up
There are two main fretting hand positions: speed shape and phrasing shape.
Speed shape is good for:
- playing fast solos/riffs
- playing power chords
- quickly moving around the neck
- playing 3 notes per string patterns
Phrasing shape is good for:
- playing slower licks/riffs
- using various soloing techniques like slides, bends, vibrato, hammer-on, pull-off
- practicing scale positions as a beginner
If you like this article, make sure you help us grow by sharing it with your friends.
If you have any questions or suggestions – let me know in the comments.
Read more:
- Taylor 214ce – Top-Line Acoustic Guitar From Taylor!
- Budget acoustic guitars
- How to start soloing on guitar